How to Repair Water Damaged Drywall? Water damage can wreak havoc on drywall, causing it to crack, peel, or even collapse if left untreated. Addressing water damage promptly is crucial not only for aesthetic reasons but also to maintain the structural integrity of your home and prevent mold growth.
This comprehensive guide will walk you through the steps to effectively repair water-damaged drywall, ensuring your walls are restored to their original condition and providing a safe living environment.
Repairing water-damaged drywall involves identifying the damage, preparing the area, replacing or patching the drywall, and finishing with priming and painting to restore its appearance and integrity.
Identifying Water Damage on Drywall
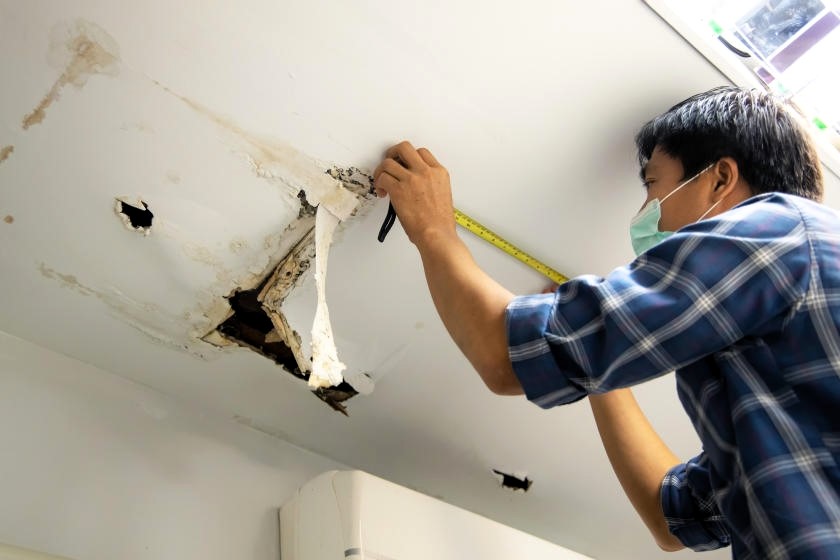
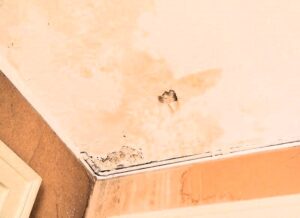
Water damage can manifest in various ways, making it essential to identify the signs early. Look for cracking paint or bubbling wallpaper, which indicates that moisture has penetrated the surface. Soft drywall that feels spongy to the touch is a clear indicator of significant water exposure. Musty smells and visible water rings or stains, often light brown, are also telltale signs of water damage. These issues can arise from flooding, burst pipes, slow leaks, inadequate sealing around doors or windows, or even clogged gutters that cause water to seep into your walls.
Safety Considerations for Repairing Water-Damaged Drywall
Before you start repairing water-damaged drywall, ensure you take necessary safety precautions. Wear protective gear such as safety goggles, gloves, and a dust mask to avoid inhaling dust and mold spores. If you encounter black mold, which can be toxic, it’s best to hire professionals for remediation. Always work in a well-ventilated area and follow all safety instructions on the products you use.
Equipment and Materials Needed for Repair
Having the right tools and materials is crucial for a successful repair. You will need a fan, dehumidifier, drop cloth, scrub brush, hammer, keyhole saw, utility knife, straight edge, saw, drill, putty knife, and a paint tray and roller. Essential materials include bleach, a tape measure, drywall patch or sheet, 1 inch by 3 inch scrap lumber, drywall screws, drywall tape, joint compound, fine-grit sandpaper, wall texture spray, primer, and paint.
Steps to Repair Water Damaged Drywall
Prepare the Area
First, fix the source of the water damage to prevent further issues. Then, dry the affected wall completely by draining any remaining water, using fans, and placing a dehumidifier nearby. Open doors and windows to aid air circulation. It typically takes three full days for wet drywall to dry thoroughly.
Remove the Affected Portion of Drywall
Cut away the damaged drywall using a keyhole saw. Aim to keep your cuts straight and squared at the corners. For small sections, drywall patches are easier to manage. For larger sections, you may need a full sheet of drywall. Use the removed piece as a template for cutting the new drywall.
Fit and Install the Drywall Patch
Measure and cut the new drywall to fit the damaged area. For holes greater than 4 inches wide, insert a 1 inch by 3 inch scrap lumber into the hole and secure it with drywall screws. Attach the drywall patch to the lumber or studs, then apply drywall tape to the seams. Smooth a thin layer of joint compound over the patch, let it dry, and repeat two to three times for a seamless finish.
Prime and Paint
Once the compound is dry, sand the surface lightly for smoothness. Apply a matching wall texture spray if necessary, then prime and paint the repaired area to blend with the surrounding wall.
Conclusion
Repairing water-damaged drywall is a meticulous process that involves several crucial steps, from identifying the damage to preparing the area, replacing or patching the drywall, and finishing with priming and painting. By following these guidelines, you can restore the appearance and integrity of your drywall, ensuring a safe and aesthetically pleasing environment in your home. Remember, prompt action and proper techniques are key to successful repairs.
FAQs How to Repair Water Damaged Drywall
Q1: Can water-damaged drywall be completely restored?
Yes, water-damaged drywall can often be restored if the damage is not too extensive. Minor damages like stains and small cracks can be fixed by cleaning, patching, and repainting. However, if the drywall is severely soaked or has mold, it may need to be replaced. Consulting with a professional can help determine the best course of action.
Q2: What are the first signs of water damage in drywall?
The first signs of water damage in drywall include discoloration (usually yellow or brown stains), soft or spongy texture, bubbling or peeling paint, and a musty odor. In severe cases, you might notice sagging or bowing in the drywall. Early detection is crucial to prevent further damage and mold growth.
Q3: How long does it take for mold to grow on wet drywall?
Mold can start growing on wet drywall within 24 to 48 hours under ideal conditions. This growth period depends on factors like humidity, temperature, and the presence of organic materials. It’s essential to dry wet drywall as quickly as possible to prevent mold growth and related health issues.
Q4: Is it safe to repair drywall with mold on it?
Repairing drywall with mold can be hazardous if not handled properly. Mold spores can cause respiratory issues and other health problems. It’s important to wear protective gear, such as gloves, goggles, and a mask, and to work in a well-ventilated area. If the mold is extensive or black mold is present, it’s best to hire a professional for remediation.
Q5: Can I just paint over water-damaged drywall?
No, painting over water-damaged drywall without proper repair is not recommended. The underlying damage needs to be addressed first, including drying the area, removing any damaged drywall, and treating for mold if necessary. Simply painting over the damage will not fix the issue and can lead to further problems down the line.
Q6: What should I do immediately after discovering water damage on drywall?
Upon discovering water damage, first identify and fix the source of the water to prevent further damage. Then, begin drying the affected area using fans and dehumidifiers. Remove any standing water and damaged materials. If mold is present, take appropriate safety precautions and consider professional help for remediation. Document the damage for insurance purposes if needed.


